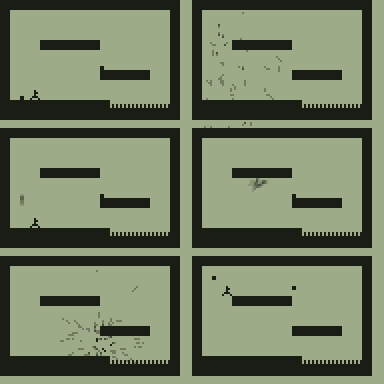
So some of you might be wondering - how do I make those awesome particle explosions I've seen in games like Stick Ninja, Tag, and Graviter? Although it might seem a bit daunting, they're actually really simple to create.

First of all, let’s start out with some pseudocode so it’s easier to understand what we’re about to do. We’re going to want to store each particle as part of a larger array, and loop through the array to update and draw these particles. The particles will be affected by gravity and collisions with other pixels.
This method is similar, but not exactly like cellular automata. First of all, we’re not going to want any of our particles to interact with each other, because they’ll end up colliding where we don’t want them to and that could be painful.
Let’s start out with some container code:
Code: (container)

Repeat getKey(15)


End
Awesome. We just finished the most important part - a way to get out of the program. Give yourself a pat on the back!
But we’re not done yet - we still have to make that particle code. In this tutorial we’ll be using L1, which is 714 bytes. You can use other sections of free ram or even appvars, but we’re not going to be going there.
Let’s first list out all the attributes of each particle:
x-position: 2 bytes (inflated by 256)
y-position: 2 bytes (inflated by 256)
x-velocity: 2 bytes (signed)
y-velocity: 2 bytes (signed)
So each particle will take up 8 bytes. The maximum number of particles L1 can support will then be 714/8=89, but we’ll go with 80 just to be safe. If you want your explosion to be faster, you can decrease the number of particles or use Full.
NOTES: {r} is the superscript r, located in Angle (2nd+Apps)
Code: (particle code)

Repeat getKey(15)			//Our container code. Keeps repeating until user hits Clear
For(r1,0,79)				//Loops through all 80 particles
r1*8+L1->r6				//Stores a pointer to the position of the particle in the array to r6
{r6}{r}+{r6+4}{r}->{r6}{r}		//Increments the x-position by the x-velocity
{r6+6}{r}+4->{r6+6}{r}			//Increments the y-velocity due to gravity. I find 4 to be a nice number.
{r6+2}{r}+{r6+6}{r}->{r6+2}{r}		//Increments the y-position by the y-velocity
Pxl-On({r6}{r}/256,{r6+2}{r}/256)	//Draws the pixel
End
DispGraph				//Displays the screen when all the pixels have been drawn
ClrDraw					//Clears the screen so that the next set of updated particles can be drawn.
End
Awesome. Now we have code that can update and draw pixels. But there’s one problem - we haven’t set the inital values for these particles!
Code: (Init)

For(r1,0,79)
r1*8+L1->r6
12288->{r6}{r}				//Sets the initial x-position of the particles to 48 (inflated by 256)
12288->{r6+2}{r}			//Sets the initial y-pos to 48
rand^300-150->{r6+4}{r}			//Sets the x-velocity to a random number between -150 and 150 (no bias)
rand^300-325->{r6+6}{r}			//Sets the y-velocity to a random number between-325 and -25 (biased upwards)
End
To put it all together,
Code: (final)

For(r1,0,79)
r1*8+L1->r6
12288->{r6}{r}
12288->{r6+2}{r}rand^300-150->{r6+4}{r}
rand^300-325->{r6+6}{r}
End
Repeat getKey(15)
For(r1,0,79)
r1*8+L1->r6
{r6}{r}+{r6+4}{r}->{r6}{r}
{r6+6}{r}+4->{r6+6}{r}
{r6+2}{r}+{r6+6}{r}->{r6+2}{r}
Pxl-On({r6}{r}/256,{r6+2}{r}/256)
End
DispGraph
ClrDraw
End
Just type that all in and you’re all ready to go! Keep in mind that this code can be adapted for a wide variety of purposes. For example, by adding a z-position and z-velocity as well as collision checks, you can make a 3d-looking explosion:

So the possibilities are endless ^^ Note that this code is not optimized for tutorial purposes.